Built with love by Lazar Dragos George. The content may not be distributed without my permission.
14 May 2025
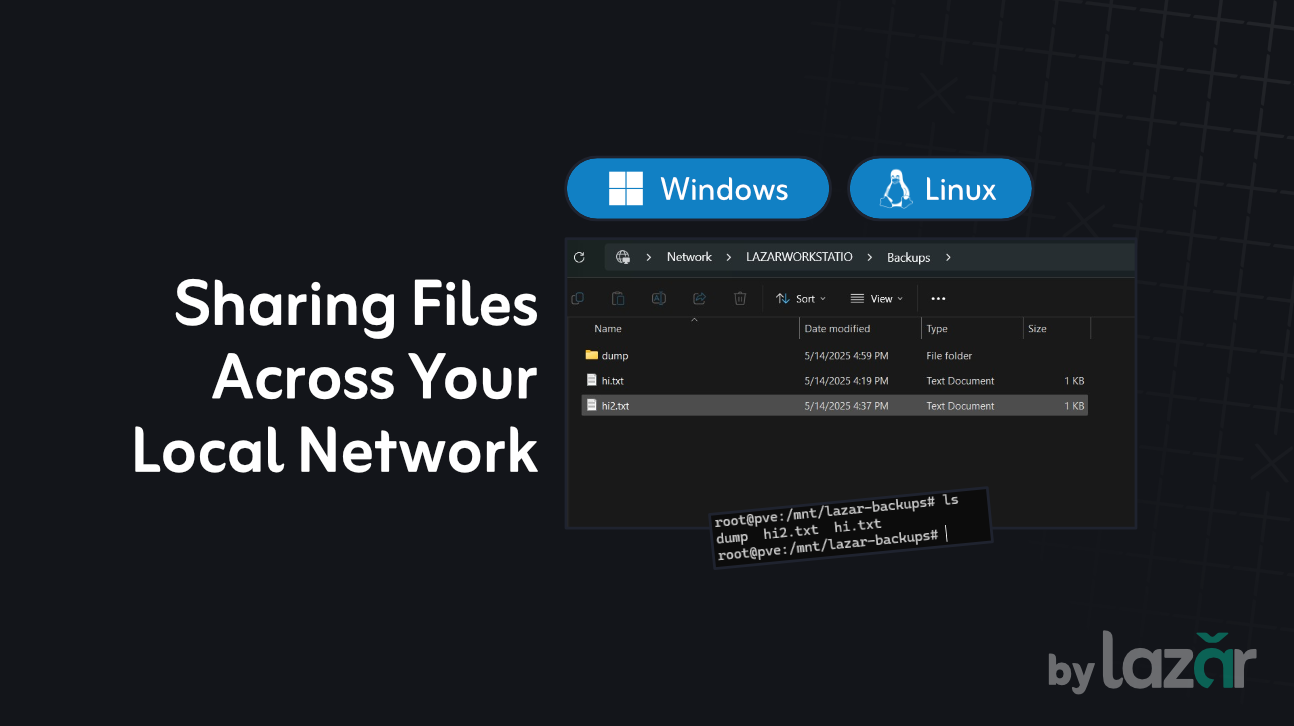
Sharing Directories Across Your Local Network
Whether you're trying to back up files to another computer, share a media library, or simply access your work folder from a laptop in the same house, local network file sharing is a fast and secure way to transfer data without using the internet.
In this guide, we’ll walk through setting up shared folders on a Windows machine and accessing them from a Linux device using CIFS (Common Internet File System).
Part 1: Setting Up Folder Sharing on Windows
To share a folder from your Windows machine, you need to enable network discovery and file sharing.
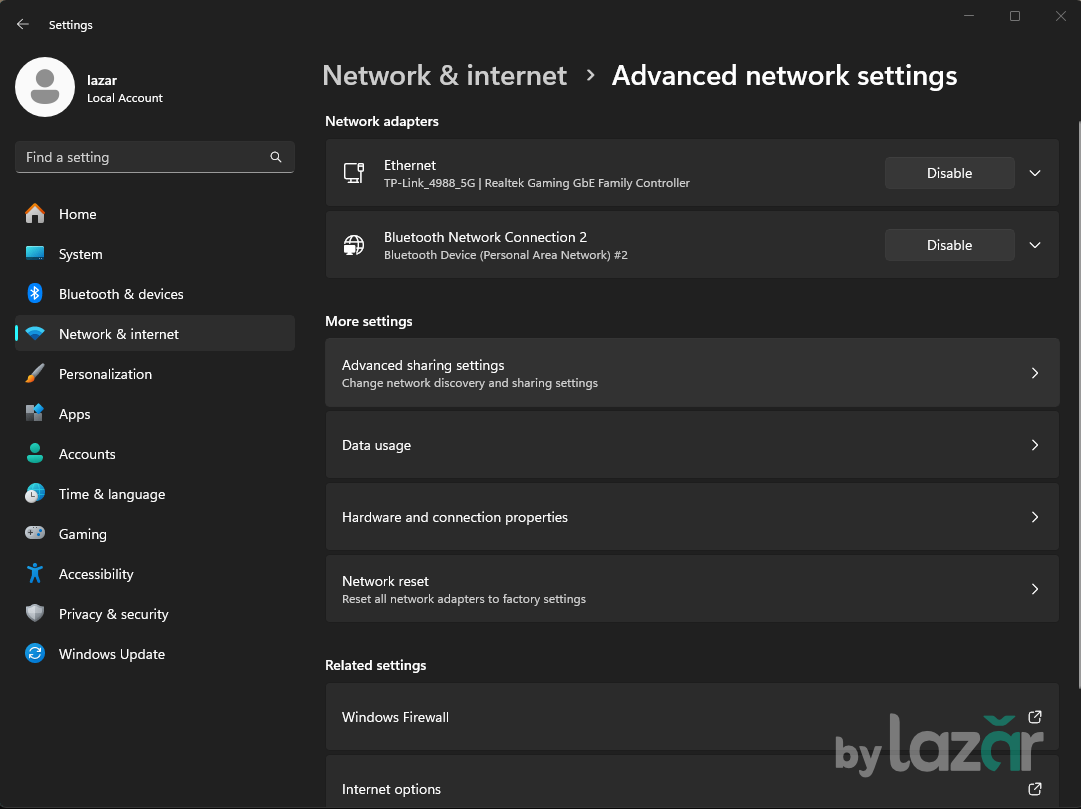
Step 1: Enable Sharing Settings
- Open Settings from the Start menu.
- Go to Network & Internet.
- Scroll down and click on Advanced network settings.

- Under More settings, choose Advanced sharing settings.
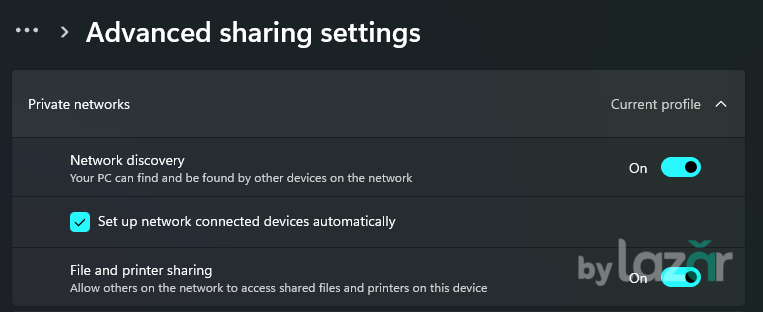
- In the Private Network section, enable the following:
- Network discovery
- File and printer sharing
- Allow Windows to manage homegroup connections
💡 Make sure your current network is set to “Private.” You can do this from Settings > Network & Internet > Wi-Fi (or Ethernet) and click on the active connection. Choose Private under Network profile.

Step 2: Share a Folder
- Right-click the folder you want to share.
- Click Properties > go to the Sharing tab.
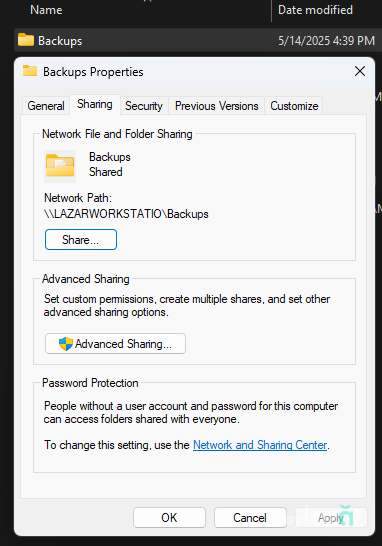
- Click Advanced Sharing....
- Check Share this folder, give it a name, and click Permissions.
- Add permissions (e.g., allow Everyone full access if you trust the network or only some users).
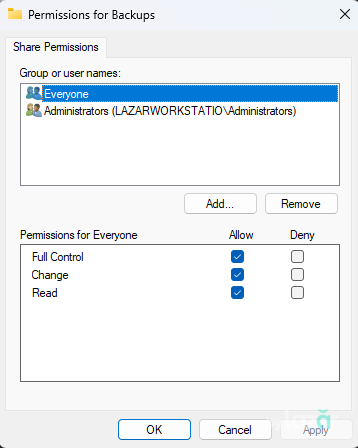
- Click Apply and then OK to save.
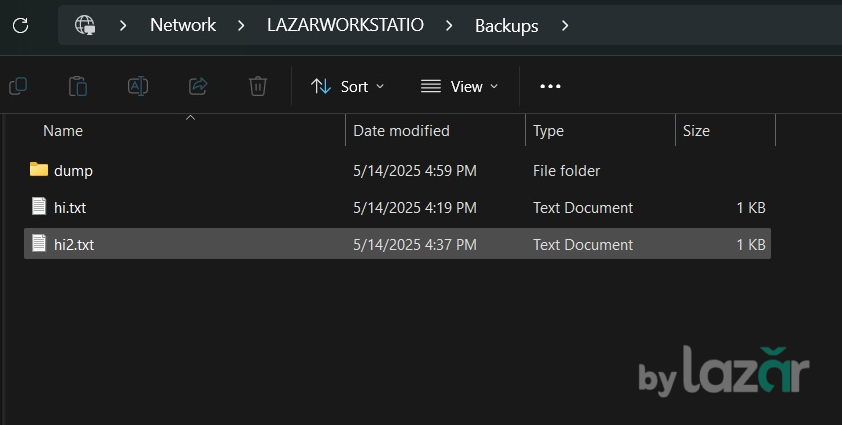
✅ Now, your folder is shared and can be accessed over the network. It will be visible under the Network section in File Explorer from other Windows machines.
Part 2: Accessing the Shared Folder from Linux
On a Linux system, you can mount the Windows shared folder using CIFS, which is part of the Samba protocol suite.
Step 1: Install CIFS Tools (if not already installed)
On Debian/Ubuntu:
sudo apt update
sudo apt install cifs-utils
On Fedora:
sudo dnf install cifs-utilsStep 2: Mount the Shared Folder
Use the mount command to connect to the Windows share. Here’s an example:
sudo mount -t cifs -o username=WINDOWS_USER,password=WINDOWS_PASSWORD,rw,uid=1000,gid=1000 //192.168.1.100/Backups /mnt/lazar-backupsWhat each part means:
- -t cifs: Specifies the file system type (CIFS for Windows shares).
- -o: Mount options, such as:
- username=WINDOWS_USER: The Windows user account.
- password=WINDOWS_PASSWORD: Password for that account.
- rw: Mount the share with read/write permissions.
- uid=1000,gid=1000: Make the mounted folder owned by your Linux user (replace 1000 with your UID/GID).
- //192.168.1.100/Backups: The Windows share path (IP + folder name).
- /mnt/lazar-backups: The mount point on your Linux machine (make sure this folder exists).
You can now access the files using any file manager or terminal on your Linux system.

Optional: Add Mount to fstab (Auto-Mount on Boot)
If you want the share to be mounted automatically every time you boot, add this line to your /etc/fstab:
//192.168.1.100/Backups /mnt/lazar-backups cifs username=WINDOWS_USER,password=WINDOWS_PASSWORD,rw,uid=1000,gid=1000 0 0⚠️ Security Tip: For better security, store your credentials in a separate file (e.g., /etc/samba/creds) and change the fstab entry to use credentials=/etc/samba/creds.
Wrapping Up
With just a few steps, you can seamlessly share and access folders across Windows and Linux devices in your local network. It’s perfect for:
- Backups
- Media streaming
- Project file sharing
- File sync between machines
Happy syncing! 🐧